How to Burn Bootable OS ISO to USB using Rufus Software or How to create ISO Image File to Pendrive / USB Flash Drive using Rufus .exe file….
What is Rufus? This a well-known tool for many computer experts and can be used in formatting USB drives to make them bootable. Additionally Rufus is used on windows and burn on most ISO file for the USB. This is a very important tool to have around as the drive driod users use too. Rufus has more advantages when it comes to creating USB installations on the ISO and Linux devices. This not all if your device doesn’t have OS, Rufus will work so well with it.
Now for one to have an ISO file on a flash drive or the USB you have to go through some few processes. It whole different story when it comes to burning an ISO to the USB. One might take it as just copying however you need a tool to make this work easier. Rufus is our tool today, one doesn’t need to boot from the tool when the procedure is done. The process is fast as it takes only 20 minutes but remember it also depends on the file size.
How to burn an ISO to USB using Rufus Software (Pen drive)
As said the process works for all the windows ISO it is fast and won’t take much of your time. Let’s look at the simple steps to burn windows 7 / 8 / 8.1 / 10 OS ISO to USB using Rufus Software:
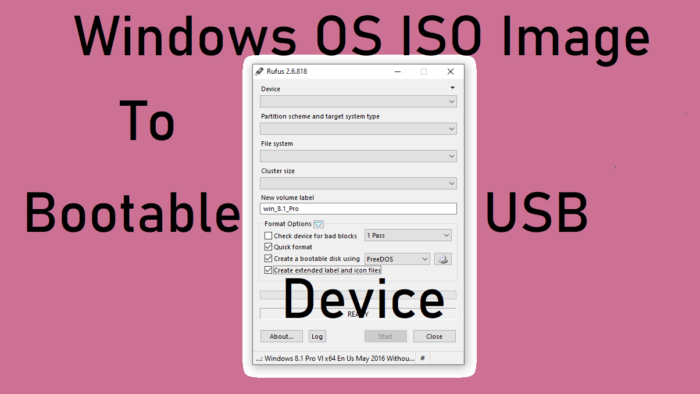
- On your browser please download Rufus Software a tool used to upload windows 7 / 8 / 8.1 / 10 Operating System into Bootable USB drives at http://rufus.akeo.ie/ website.
- Now get all the information of the file you want, copy all details to your USB device
- After copying all the files now double click on the Rufus which you downloaded in the beginning.
- The program will commence plug in your USB or flash drive on your PC which you need to burn.
- On the screen check the menu and select the USB storage you want to work with.
- Again on the drop down menu check on the boot section where the disk or he USB device is selected.
- Click on select, a window will open look for the ISO image which you want to burn on the flash drive or USB.
- After making a selection now click on the open button.
- The Rufus device will start inspecting the ISO file you’ve taken. Give it some time as it will be according to the file size.
- In some cases the file might not be supported by the device.
- Assuming the file is not supported just go to the standard windows installation.
- Proceed but don’t touch any of this: partition scheme, target system, file system and the cluster size.
- Note if you are not sure or have no orders to go to either of this don’t touch.
- No click on the start button to for the burning procedure.
- A warning text will appear on the screen click OK. The information will be as follows (all the information will be deleted).
- Ensure the flash drive or the USB is empty before starting the process.
- In few minutes the Rufus will format the USB to make it bootable.
- It will then copy all the files on the USB or flash which are in the ISO image you have already chosen.
- If the procedure is over the status of will show as ready now remove the drive and close the Rufus program.
How to install Windows 7/8/8.1/10 OS from USB Flash drive
With different technologies one doesn’t have to worry if their PC doesn’t have an installation disc or CD drive. Just create a bootable ISO File to USB Bootable flash drive using Rufus tool and with a perfect installation device you are good to go. You can install are window versions using a USB here will see steps to follow in the installation procedure.
- First learn about your computer whether it runs on 32-bit system or 64-bit system. With this simple act you will know what to download.
- After checking now go to your flash drive check whether it is a 4 gigabyte flash. Wondering why? In real sense most window file need 4 and more gigabytes for proper installation.
- Now plug the flash on the computer you want to install the windows.
- Before anything format the flash if FAT32 or exFAT. The process will take place by selecting the file system pick on the FAT32.
- Please note this will affect your details on the flash. All the information will be deleted, it advisable to save it somewhere and use an empty flash drive for the installation.
- Start downloading windows installation tool. You can actually open a window like windows 10 then select download tool.
- On this page just double click on the media center tool EXE file. The system will give an option of ‘yes’ select it. There will be terms and conditions displayed accept and proceed.
- There are few procedures where you will fill out details then the installation option will show.
- Choose the language, window and choose an architecture for the whole process.
- When the installation tab shows now click on the create installation media. Select the proceed button remember the language and other option as mention above. Select the name of the flash drive to start the installation process.
- Give the flash drive sometime to set up all the file and download them in the flash drive.
- Now you can continue and place your computer in boot order.
Remember, you will have to select the installation tool for the Windows that you want to install. For instance, if you want to install Windows 7, then you must download an installation tool for Windows 7. Failure to this, you will not be able to install the Windows that you want.
How do I change Boot Priority order and How to Enable USB option in BIOS?
This just an order where by the computer searches for nonvolatile data storage devices. They have a code which helps in loading OS. Some use the ROM while others use the BIOS in order to start the boot process. In getting the order the CPU will generate the OS in the system memory.
- Have the computer you want to install windows note new version won’t work with kind of method.
- Now place the flash drive in one of the ports.
- Restart the computer by clicking the start button then restart. If the PC is not open start the computer then go to the restart button.
- Now click on the computer BIOS key. This are the ‘ESC or DEL’
- After this look for the boot order tab, it is only found on the advance settings here you will get a lot of tabs to choose from.
- Look for the name of your flash drive.
- Click on the name and move it to the first row on the list.
- You have to save all the changes taking place before you remove the BIOS
- Proceed in restarting the computer and the process is done.
This are the simple ways to install windows one needs the right devices proper 4 gigabytes or more checking the architecture of your computer with this proceed to a successful installation.